DIY Holiday Planters
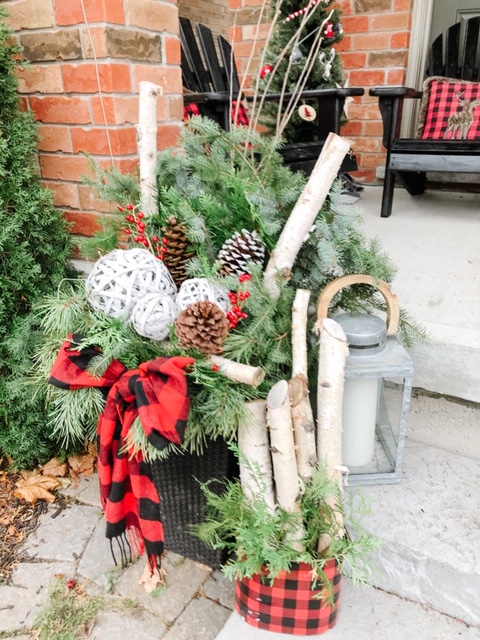
Our porch is fairly high so I love to flank the stairs with a big planter for all the seasons. It lines the stairs so my kids don’t fall off the porch but also looks welcoming and inviting when you have some size there based on the scale of your entrance! BUT … when it comes to holiday arrangements, the big ones are SO pricey! I can’t quite bring myself to spend $200 on two arrangements. I used to buy smaller ones and then add more greens to it but over the past 3 years or so I’ve just started making my own! Thought I’d bring you along in case you want to try it too!
It does require some adventuring if you’re up for the challenge! I usually go with a friend and we bring our clippers into a nice wooded spot to get what we need! I try to find a variety of spruce, pine and cedar to mix up the colour and texture in the containers and it does take more greens than you expect so bring home more than you think! Here I am in the thick of it – ha!
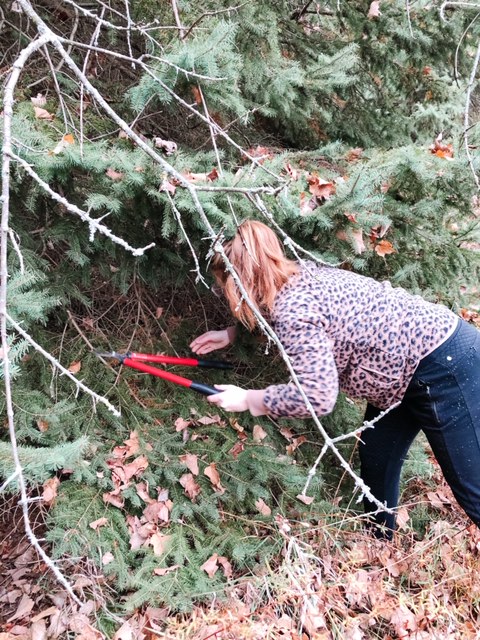

Looking rather disshevelled after trapsing through the woods but in my books, that’s all part of the fun! I lay a tarp in the back of the van to try and minimize the mess and head back home to create!

I have two tall planters that I bought from Costco years ago and I just swap out what goes in them every season. They’re a tall, black basket weave and have been pretty durable. In the past I’ve made my arrangements in the pot from my fall mums, added dirt to make the arrangement in and then just sat it into the planter. But because I wanted something on a larger scale, the past few years I’ve just used my empty planter, weighed the bottom down with some rocks and created the arrangement in the empty planter itself. This means clipping some longer branches so that you can push them down into the bottom of the planter and it won’t tip over! I also use long pieces of birch that I save year over year and that helps with stability as well. I’ll lay out a step by step for you here, although I didn’t take pictures of each step so I hope you can visualize!

Step 1 – I like to start with a big fan of spruce at the back of the planter. Start big at the back and work smaller as you move to the front. The birch won’t stay in place until you get some greenery in there so don’t worry about that right at the start. Add a few branches of spruce until you have good coverage and width.
Step 2 – Then I add a big bough of pine to the middle. Pine is very full and depending on where you clipped from it can be a bit sparse so I clip a few bigger pieces and squeeze them in together to make the middle full and fluffy!
Step 3 – I add cedar to the front to fill the planter. It’s a lighter green and kind of fringey so I like it at the front. Totally up to you and what you feel looks good.
Step 4 – Now that my planter is full-ish with greenery I can place my birch. I use two long pieces at the back and each side and one smaller piece horizontally along the front but again, totally up to you with how much you want! It can take some playing around with to get the right angle and make sure they’re sturdy.
Step 5 – Then I work to fill in more greenery until the planter is stuffed full and nothing is moving. You can see I did go back add some cedar to the middle for texture and height and more pine along the front to create a fringe. Change up the angle you’re tucking them in so it kind of falls downwards over the front. I love the way that looks!
Step 6 – Once you’re happy with your arrangement, you can start to add your extras – pine cones, berries, ornaments, bows etc are what’s going to bring it to life! I do something different every year and have usually used ornaments clustered together in threes in the past. This year, I’d picked up this white ball picks from Bradford Nurseries LAST YEAR after Christmas when they were on sale for 70% off! (Holiday tip – always shop Boxing Day sales for Christmas decor and then pack away for next year! You’ll find amazing deals and it’s a fun surprise when you open up your decor bins the following year!). I thought these were fun and natural looking and I liked the white. So I used three in different sizes to cluster together, added some big pinecones and a smaller one (I’ve kept from past arrangements), some red berry picks (from the dollar store) and a bow!
Step 7 – BOWS! I usually use ribbon and make my own bows but I saw this idea and thought I’d try it this year! These “bows” are actually a scarf that I just tied into a bow! They’re from Dollarama and I think were $3.50 each so actually probably cheaper than buying a roll of wired ribbon! Will see how they hold up but I like the look so far and think it’s fun and different!
Step 8 – You could absolutely add some mini lights to your arrangements if you like that look too but that is pretty much it! Play around with the placement of your accessories and have fun with it! Don’t be afraid to pull them out and start over if it doesn’t feel balanced. Make sure you’re putting things on both sides but it doesn’t have the be symmetrical!


I’m really happy with how this year’s turned out! What do you think?! I should also mention that the more neutral you keep it, the more versatile it would be to keep out all winter! I will probably remove the plaid bow and be able to keep these out front long after the holidays are over, so keep that in mind too! If you attempt your own this year, I’d love you to tag me on Instagram (@a.gingered.life) with your finished product! Have fun with it and enjoy! We are just getting started with the holiday season!
xo,
Jodi
You May Also Like
Hi friends!
October 8, 2020
Sweats aren’t for the weekend anymore!
October 24, 2020


2 Comments
Melanie Hunt
So much fun! They look amazing, as always!!
Ritu Costigan
Absolutely love them! Not sure if I can create such a nice piece. I will try and create some sort of festive porch. Yours looks great!