
Renovation Station – Lessons in Renovating and Would I Do It Again?
Phew! Halfway through January and I can’t actually believe it! I know I’ve gotten away from writing and sharing here and I am time blocking my days to get back at it! I’m now working with my husband Marc in his coaching business supporting him in marketing and social media, as well as managing my own PT events pillar of the business, but I just LOVE sharing my home and style inspo with you all so I want to work in back into the schedule too!
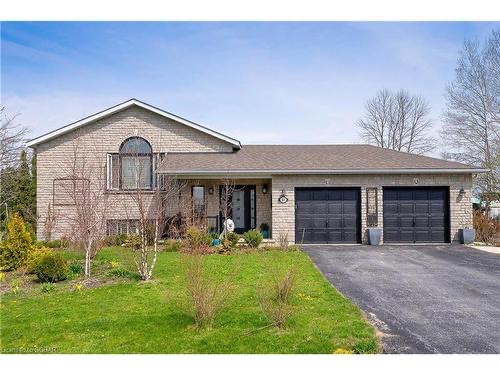
I thought I’d start by sharing my thoughts on our almost full home renovation. My last post was about our move and the challenges we faced there but the renovation itself was a whole different ballgame and I certainly learned a lot as we went! We bought this house sight unseen which is a little crazy. We’d been looking in the area for quite a while and hadn’t seen anything we loved or that we could act on at the time. We wanted something that wasn’t as cookie cutter, that had a bigger fully fenced yard and we were willing to put some work into the house if the lot and location was right. When this house was listed we sent my parents to take a look. They confirmed it needed a lot of updating inside but that the lot was huge. They also confirmed there was a TON of yard maintenance as the previous owners were gardeners and there are gardens EVERYWHERE that have no been well kept over the past few years. But this house had a large backyard with a beautiful pool, in a subdivision that backs onto a golf course and where you’re not on top of your neighbours. It was in Wasaga Beach, but in the far west end of town which means we’re only 10 min to Collingwood, 5 min to Beach 6 and 3 minutes to the Superstore, LCBO, Canadian Tire, etc. What more could you need!
An offer came in on the house before we could really decide and we knew we’d lose it if we didn’t add an offer into the mix too. We offered our max budget and maintained the mindset that if we didn’t get it it wasn’t meant to be. Well … they accepted our offer and we were homeowners! Of a house we hadn’t even seen yet! The homeowners were flexible and we came up the next day to see it. And yes, it needed a TON of work. There was lots I wanted to do but of course at that point I thought we’d pick away at it over time.
We engaged with a friend of ours who had started his own general contracting and design company. While I felt very confident that I could do all the planning and sourcing myself, I also knew that juggling the trades and sourcing from scratch would be challenging so we agreed that he would manage the project for us. Him and his partner came to tour the house with us and started to daydream of how we’d want it to look. The problem with renovating the big stuff is that it’s very easy to need to do it all at once. I really wanted to do the floors and the kitchen first. Well, if you’re doing the floors and the kitchen and already demo’ing the space, it’s more cost effective to demo all you need to rip out at the same time. And if we were doing floors upstairs I knew we also had to replace the gross carpet in the basement. Well, if you’re ripping up the floors, you should probably update the trim as it’s inevitable that baseboard will get damaged in the removal of the floors and they are dated and inconsistent throughout the house.
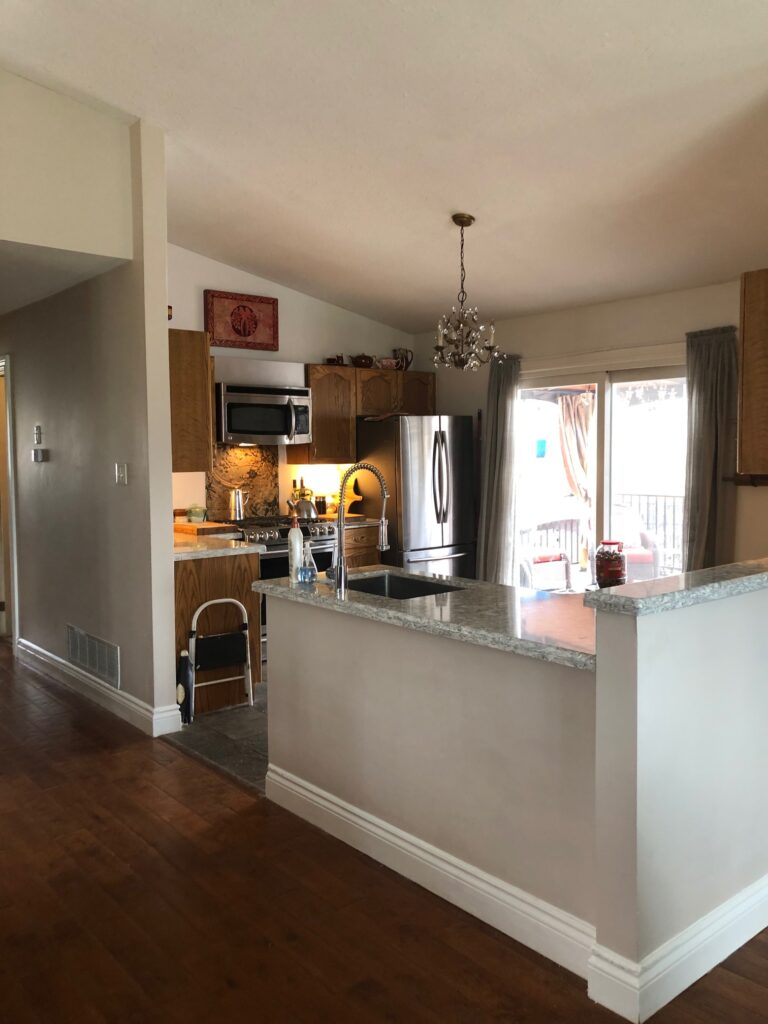
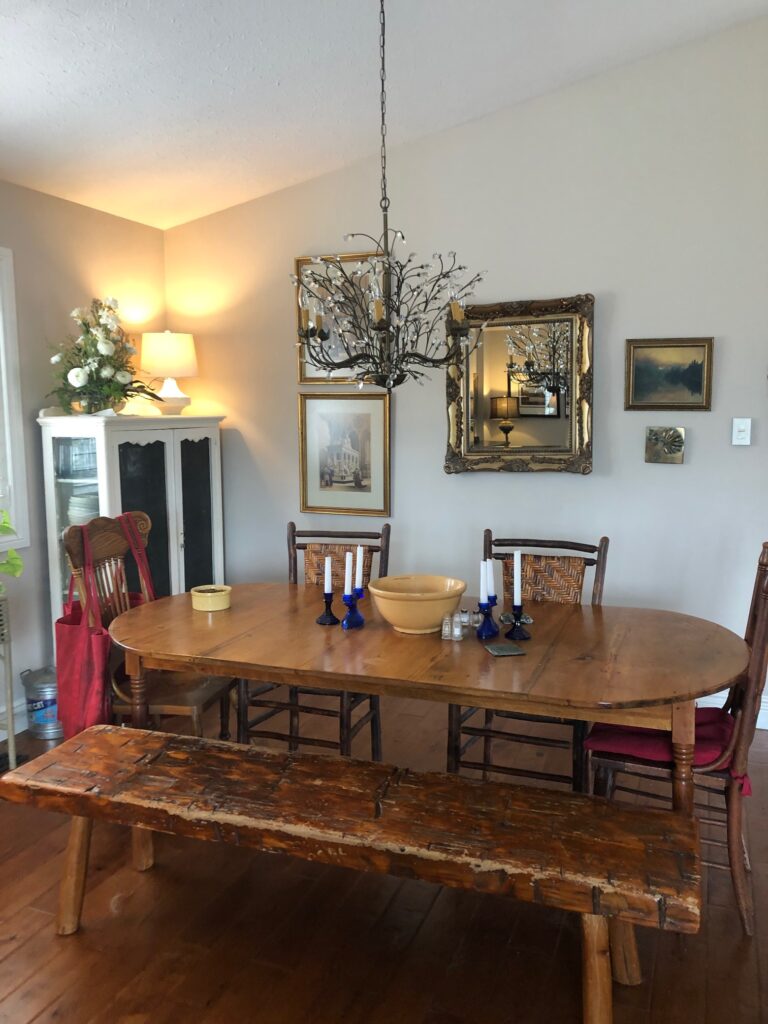

We debated the kitchen layout and brought in a kitchen designer to do the measurements. The existing kitchen was a strange size and very boxy. To walk from the stove to the sink was a good 4 or 4 steps, the fridge door hit the wall and the patio door and one side had a huge countertop for food prep, whereas the other side was choppy. If we added an island over there, it would become an obstacle to accessing the outside patio door which I know will have lots of traffic come summer and we’re going in and out from the pool. If we took out the half wall, we lost a lot of cupboard surface area and wouldn’t have anywhere to relocate. As we were discussing our contractor tossed out the idea of switching the location of the kitchen and the current dining area. It would allow us a larger L shaped space for cupboards and appliances, we could still take down the wall and add a big island with space for 4 stools. Of course my first question was “how much more will that cost us to relocate things?” and at the time he went to the basement to see that the plumbing was actually accessible and only needed to be moved along a joist. He didn’t think that would be very difficult and after weighting pros and cons we decided to go this route.
The number one thing I would say in hindsight is to always ask for a full quote or impact to your budget when making decisions! I took his word that the relocation wouldn’t be impactful to our budget but we didn’t really go through all the steps fully at that time. The relocation ended up actually costing us a lot more for the following reasons:
- Plumbing relocation to move sink under window. I also added a pot filler so water line needed to be run there and a water line run to the new fridge and dishwasher locations.
- Electrical – the stove requires a special outlet that needed to be upgraded and installed in it’s new spot.
- Range hood – I still don’t have my range hood cover made and need to figure this one out asap but the old range hood was vented through an over the range microwave and out the ceiling. That needed to be relocated too and required bringing in a roofer to cut the new hole and patch everything up. I still have a hole in my ceiling until I can commission a custom range hood cover OR I decided to attempt it myself with no woodworking experience!
- Lighting – of course the old light locations wouldnt work anymore. New holes cut for pendant lighting above the island and a chandelier above the dining table.
In any case, there was more involved than we thought and all that work required trades to get it done, and therefore became more costly. While I’m talking about lighting, that’s another one that got me. Adding in potlights proved to be a lot more work and money than I was expecting. Of course now that things are done I’m glad we have them, but outside of the hard cost of the actual pot lights themselves it was the cost of electricials running electrical through the ceiling to all these new locations.
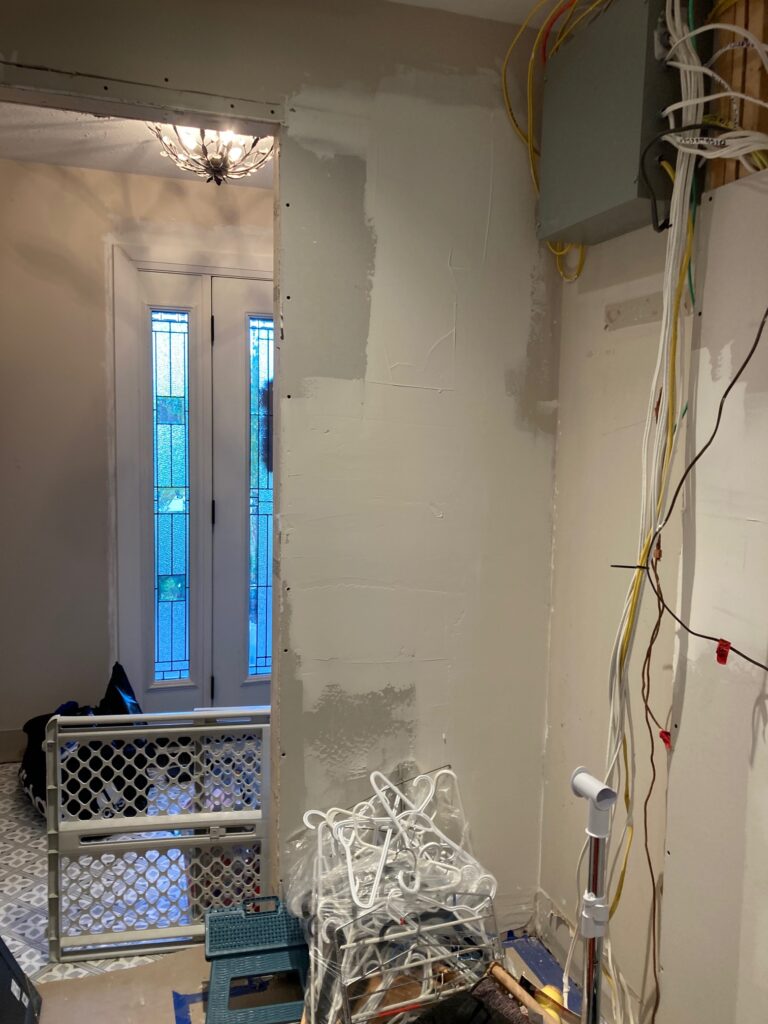
And while we’re talking about electrical, I had the bright idea to knock out our front hall closet and turn it into a mudroom. The space behind the closet was an empty part of our garage that we didn’t need. It was a perfect set up except that that the wall behind the closet seemed to house the electrical panel for the whole house. When we had it quoted to relocate the panel, which I knew was going to be expensive, of course it came up that we should actually upgrade the panel itself. We have a 100amp panel that is almost full and if we ever want to add anything additional (for us, it’s hopefully a hot tub one day) we should up the panel to 200 amp and replace it. So we decided to do that and the mudroom was built. The panel was relocated to the other side of the garage and conduit was run through our attic to a junction box that’s now hidden in the mudroom wall. But, do you see what I mean about things spiralling quickly?! Someone told us at the start to account for 30% overage on your budget and I kind of laughed. If I was in control of the budget of course that wouldn’t happen because I’d have to give up on other things. Well, somehow with the work completed that’s about where we ended up … who knew it was possible?!


As we got started on the work things were going smoothly. We were staying at my parents so they could do the demo and get the bedrooms done first so we could live in the house. When we decided to do this Marc and I both acknowledged to each other that we knew this was going to suck. That renovations are hard but that it would be worth it and we would be fine. BUT, renovations in a pandemic are even worse. Having to worry about who’s in your house, are they wearing their mask properly, running air purifiers, product delays (our kitchen took 14 weeks and living with a laundry tub in your kitchen is no fun) and trying to work from home at the same time proved to be a pretty big mess for us. It pushed us to our limits when it came to stress and in hind sight, although it may have cost more in the long run I think I would have bitten off smaller projects to start with and lived in the old space for a while even if I didn’t like it. I almost feel like I have PTSD thinking back to the fall and trying to live and work through that with two kids and two dogs and all the delays we encountered. If you don’t have to live in the space, by all means, rip the whole thing apart and do it all at once … but having to live and work here while all this was happening was just worse than we could have imagined LOL!
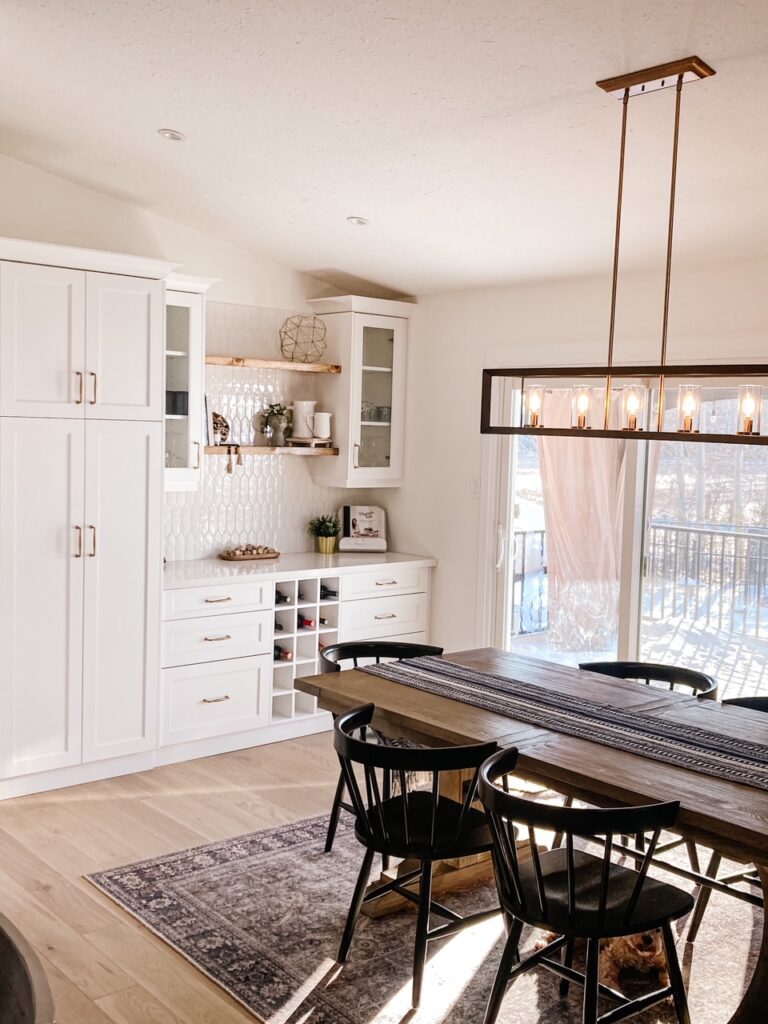
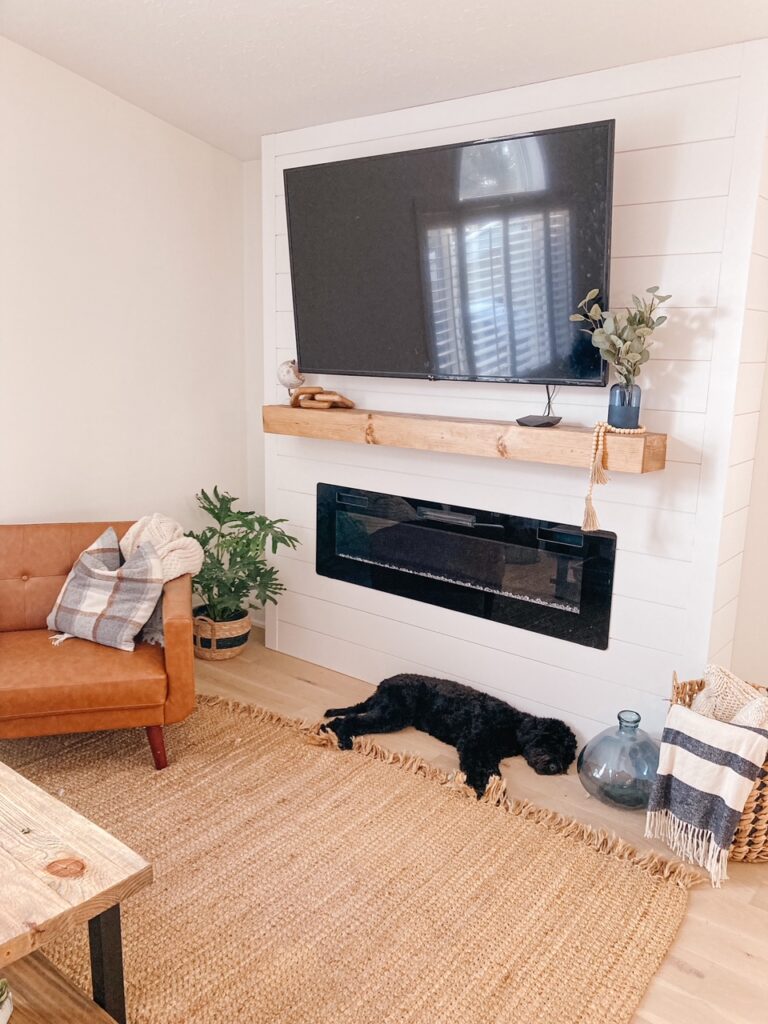
Now it’s done, save for a lot of painting of trim and doors that I still have to do downstairs and we are super happy with the updates. It’s bright and airy and modern but cozy … I look forward to hosting many of our friends and family here again soon I hope!
If you have any specific questions, by all means let me know! I’ve shared a lot of updates over on my IG page @a.gingered.life but for your records, here is a list of what we updated:
- relocate and upgrade electrical panel
- install potlights throughout main living area, as well as new pendants and chandelier
- updated flooring throughout – ceramic tile in front entrance, mudroom and master bathroom, engineered white oak hardwood on main floor and vinyl flooring in the basement
- updated trim, baseboards and shoe mould throughout (ps – this is a ton of work when you account for all door and window frames)
- brand new kitchen and dining area with storage cabinetry
- took down a wall in kitchen/main living area
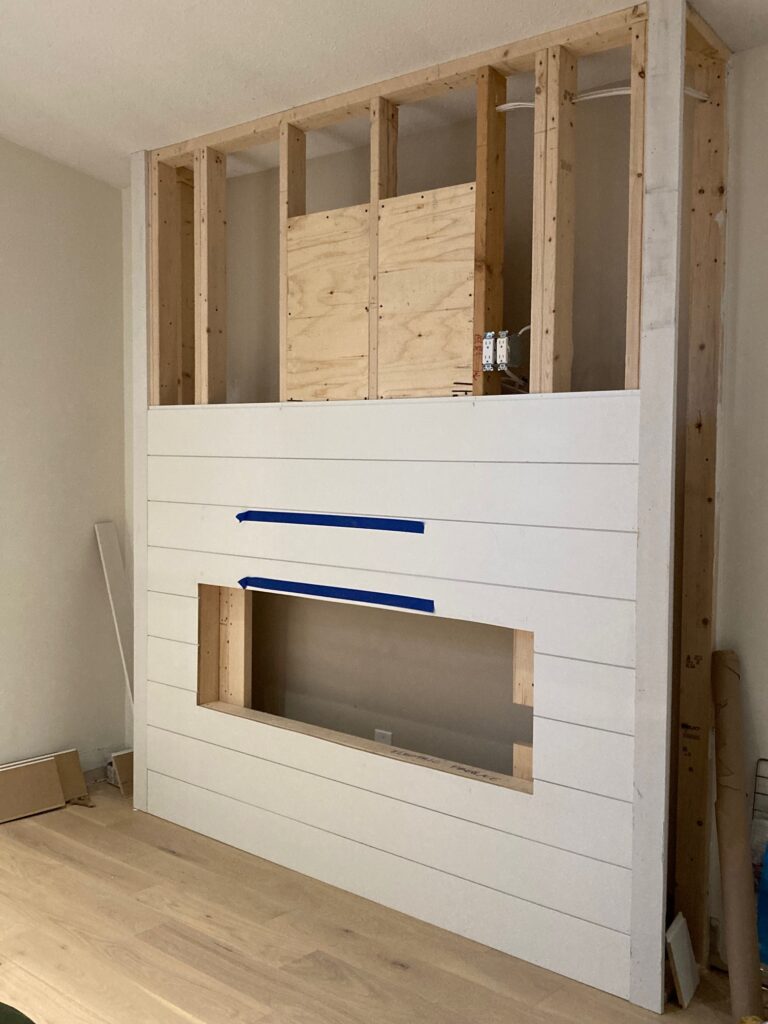
- added a fireplace bumpout and shiplapped electric fireplace with mantel
- updated stair treads made from our engineered hardwood
- blew out front hall closet to create mudroom space
- put up some walls in the basement to create another bedroom/office and a storage area (also not as easy as you might think)
- repaint and repair all ceilings
- new paint throughout (still working on this)
- updated vanity and toilet in master bathroom
- updated vanity and overhaul of main bathroom
- new doors on all basement rooms
- painted laundry room floor and new laundry tub, relocated washer and dryer for more storage space

Hoping to have most of the work inside done by the end of the winter so I can spend my spring and summer out cleaning up all these gardens! I would say it was worth it, but I’d do it in phases next time. It was too much at once and I’m still exhausted! Let me know if you have any specific q’s and I’m happy to answer!
Til next time,
J xo


8 Comments
Ritu
What a great read!
I will keep all this in mind when one day I decide to change things up on our main floor and kitchen. Thanks for sharing!🙂
Jodi Petitpas
Yes, there’s lots to consider!
Nanita
Oh my gosh! What an adventure. I’m exhausted reading all that you had to do. Lol But it all looks so fantastic!!
Jodi Petitpas
I am honestly still recovering. Doing it all in a pandemic and having to worry about who is in the house etc was a lot!
Jen
Love the mudroom idea! Would have never thought to do that and definitely didn’t buy a house we looked at in the spring because their only storage space was a tiny closet.
Jodi Petitpas
We lucked out that there was empty space behind it but I’d still say the relocation of the electrical panel was worth it!
Sdvillgow
[url=https://chimmed.ru/ ]nitikapharma com [/url]
Tegs: nitikapharma.com https://chimmed.ru/
[u]inorganicventures.com [/u]
[i]integrated dna technologies germany gmbh [/i]
[b]invivogen [/b]
Sdvillgow
[url=https://chimmed.ru/ ]mt.com [/url]
Tegs: myaccount aocs org https://chimmed.ru/
[u]icl-group com [/u]
[i]icl-group.com [/i]
[b]icpms [/b]